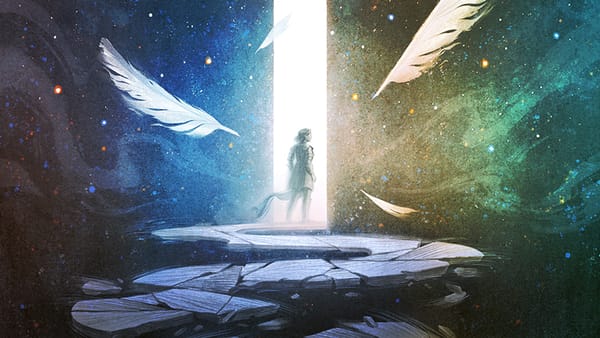
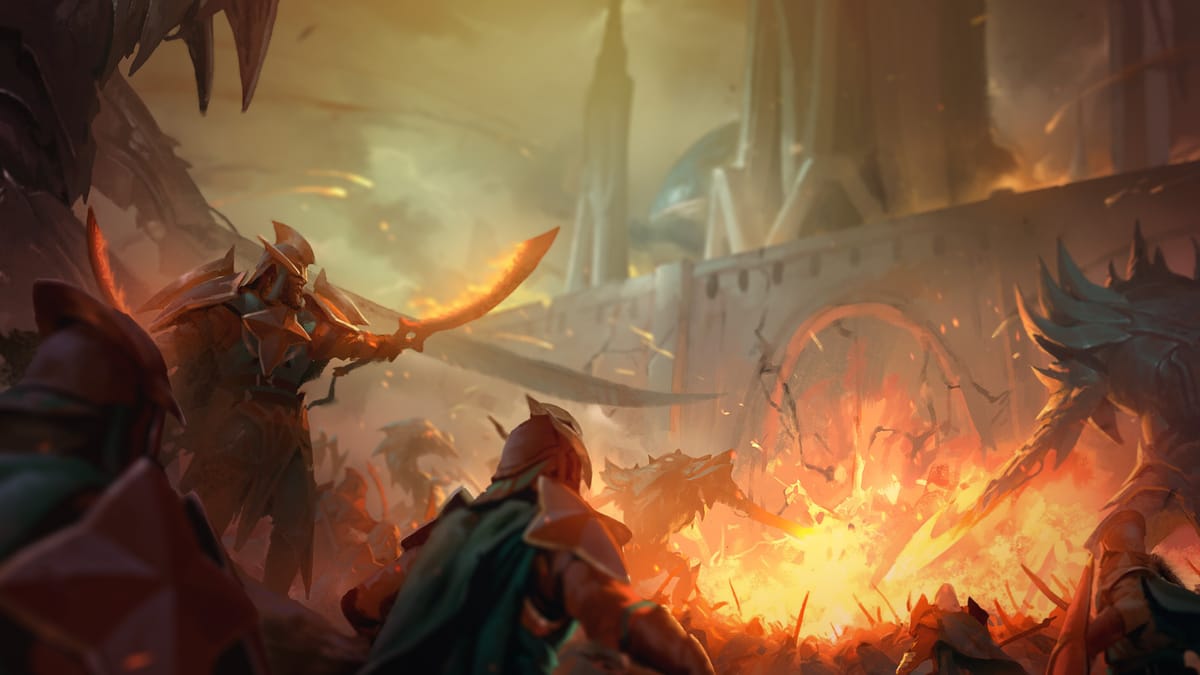
Chapter 10: Rigus - Eternity's Rampart
All is not well in Rigus. The attacks coming through the portal to Acheron are escalating, and Rigus is in danger of tipping into Gargauth's control unless the characters can stop the conflict.
This chapter holds up rather well without too much modification. All we need to do is connect the conflict in Rigus and Acheron to Gargauth and Shemeshka's scheme.
Entering Rigus
The characters should feel tension in Rigus right away. When the guards question their business they should ask for names of people they are seeking as well.
At least two of the entrance guards should wield corrupted celestial weapons that are easily recognizable by the characters. These guards seem more tense and aggressive than others. If they inquire about the weapons the guards will say they are fine blades procured from Fetchtatter, the arcanaloth arms broker.
The characters will attract attention if they mention the corruption of the celestial weapons, the manifests of the weapons shipments, or Zot and Sotu. They will immediately be escorted to Major Kalar for questioning.
A Rigged Fight
There aren't just mindless waves of enemies pouring through the portal from Acheron. The arcanist character bound the slaad and took the control gem, the smuggler got the slaad out of Curst and into the ranks of the Crown Generals, and the fixer faciliated recruiting Zot and Sotu into Gargauth's army. The characters are responsible, of course, for the entire weapons trade, but they didn't need to reach out to Fetchtatter. He saw the business opportunity when the weapons hit the market and spread them on his own.
Gargauth isn't just trying to conquer Rigus, although that's what it looks like on the outside. He wants to corrupt it from within and bend the armies to his will. Zot and Sotu are leading a frontal assault, but this is causing factions within Rigus to argue with each other.
Three Camps
There are three predominant modes of thought taking over Rigus.
The Righteous. Represented by Major Kalar, these soldiers want to go on the offensive and take Zot and Sotu out. The armies here are typically hired to fight on Acheron, not against it, so this is a departure. Many of these soldiers wield the corrupted weapons, have come under Gargauth's influence, and are quick to rally behind any leader who takes a proactive, violent stance.
The Doubters. Rumors have it that fiendish forces are interfering. They say the weapons flooding in from Automata and the compromised tactics point to outside forces corrupting Rigus. These rumors come from Sergeant Luggik, and they're true. Gargauth seeded them intentionally. He knows that truth, bent to his will, is often the best way to capture the hearts and minds of his subjects. These soldiers are losing faith in the Crown Generals and want to go on the offensive against Automata and Ribcage, triggering a massive invasion.
The Reticent. There are those who aren't pacifists but do choose their battles. Represented by Sergeant Gauller and ultimately backed by General Braahg, these soldiers think either offensive is too costly. They recognize the ebb and flow of war and think this period of hostility will subside.
If the battles are allowed to proceed uninterrupted, then General Braahg's reluctance to fight will allow Gargauth's corruption to spread. Eventually the reticent warriors will lose out to the aggression of the doubters and the righteous.
If Gaurgauth's plan is successful Zot and Sotu will break the armies, join up with Sergeant Luggik, and lead their factions to march on the Outlands. This is the spark that will ultimately allow Gargauth to gain control of these gatetowns and send them crashing into the Nine Hells.
Outside Influence
Fetchtatter is an interesting wrinkle. He is aware to some degree of what will happen if Gargauth creates all out war in the Outlands. There's lots of short term profits of course, but he is loyal to the deposed archdevil Bel.
When Gargauth's war on the Hells kicks off, the first major battleground is Avernus. Fetchtatter sees that as an opportunity to get rid of Zariel, the current archduke, and allow Bel to ascend once again as the Lord of the First. He doesn't think Gargauth will be successful in deposing Asmoedeus, but he's willing to see where the chips fall and make the right play no matter who comes out on top.
Playing It Out
As the characters explore Rigus they should easily come across Major Kalar, Fetchtatter, or a an agent of one of the factions. If all else fails Sergeant Luggik himself can seek them out and press them to participate in deciding the fate of Rigus.
At some point the characters should meet Major Kalar. They can convince her that they have evidence of outside influence, and she will hire them to join her ranks. If they run afoul of her or anyone in Rigus she will call for a tribunal.
Summit
Major Kalar will bring the characters to General Braahg to plead her case for or against the characters. This meeting should happen in the Crown and be attended by the other Sergeants. Each side will have the opportunity to lay out their cases for action (or inaction), and the characters will have the opportunity to present any evidence and persuade the General to their course of action.
Allow plenty of room for roleplay and debate. Depending on how the players interact there may not be a need to roll a DC Test. If the General is hostile to the characters or they have committed a crime in Rigus, allow them a DC 15 Charisma (Persuasion) check to sway him.
The Offensive
If the characters take up Major Kalar's cause and sway the General to go on the attack, run Acheron Incursion as written. Give them opportunities to witness Luggik's betrayal. He will feel personally betrayed if they opposed him.
After the first wave of the attack, don't trigger the second wave. Instead give the order for the characters to invade Acheron itself and go on the offensive against Zot and Sotu.
Failure to Launch
If the characters don't win over General Braahg, have Major Kalar approach them privately and propose a clandestine mission with the Sergeants. Have them enter the portal through the long staircase and proceed through to Acheron where they will face both waves of battle.
Many Sided Conflict
The battle in Acheron is intended to add some flavor and plane-hopping to the fight, instead of just teasing the characters. Have them experience the transition to the plane this way:
You step through the glowing portal onto cold iron, pitted and scarred with the signs of battle. You stand on a giant cube, floating in a cloudless void.
Above you other iron cubes float and twist. SKEERASSHH! Two of them suddenly collide, screeching like a wounded animal. The smaller cube is obliterated in a spray of shrapnel.
Another, closer, screech rings out. A battalion rushes toward you, led by two-headed giants. One wears plate armor decked out in spikes. A gray gemstone glints from one of his helmets.
We can alter the battlefield events once we're on Acheron to really sell the flavor of the plane.
| d10 | Event |
|---|---|
| 1–3 | A random character sees suspicious activity from Sergeant Luggik. If they have been found out Zot or Sotu issues a command, causing the slaad to make a single attack against the closest character. |
| 4–5 | A hostile berserker leaps from a nearby floating cube and lands near a random character anywhere on the battlefield. |
| 6–9 | Stray sharpnel rains down on a random character. They must make a DC 15 Dexterity saving throw or take 2d4 Piercing damage. The 5 foot area around them becomes difficult terrain and a creature that moves within the area takes 2d4 Piercing damage for every 5 feet it travels. |
| 10 | A 10-foot-wide, iron cube smashes into the battlefield along the path that affects the greatest number of characters. Creatures in the projectile’s path must make a DC 15 Dexterity saving throw, taking 35 (10d6) piercing damage on a failed save, or half as much damage on a successful one. |
If you want to expand the battle terrain or enhance the mood, here's a few different maps available:
Megalith Gate by Czepeku
Wizard Prison Pt. 4 by Czepeku
Tattered Battlefield by Master Maps
Desert Crater by Sliph Battlemaps
Wrapping It Up
Once Luggik, Zot and Sotu are taken care of the depths of the plot should unravel. The mosaic mimir will chime and require the characters to fill in the correct reality.
Major Kalar should reward them appropriately, and they should have their leads pushing them onto the next destination. If they don't have enough clues to spur them onward, the restored mimir can fill in details about Luggik coming out of Curst or they can follow Fetchtatter's information about the weapons coming from Automata.
If the characters play their cards right with Fetchtatter, he could provide them with a little more background on the infernal jockying among the fiends. This helps with some of the lore and backstory ahead of the Gargauth reveal.